Calendar
Event Help
User Guide
Dear Participant,
- After registration, you will receive an email to confirm your identity.
- Once your account is activated, you can proceed to login.
- Upon login, users can choose to log in as a provider or receiver of a service.
- If it's your first-time login, you will be redirected to choose your area of availability. Note: The system only allows selecting one province at a time.
- For subsequent logins, you will be redirected to the calendar section, which is the main operational area.
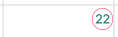
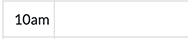
- In the calendar, as a provider, you can make an offer by clicking on a day number. You will then be redirected to a form where you can select the desired hour and provide information.
- Note that you can only post an offer 24 hours after the current time.
- From the drop-down list, select the event title corresponding to the service you are offering. If it's not in the list, proceed to step 12.
- Save to submit your offer or close to dismiss.
- Any saved offer will appear on the calendar with a mobile device shows as 3 dots icon, click and continue.

- Any saved offer will appear on the calendar with a dot on the left side, as depicted in the picture.
- Green dot: Offer available (provider view); can be deleted without negative points.

- Green dot: Offer available (provider view); can be deleted without negative points.
- Yellow dot: Offer available (receiver view); this offer has the booking status.

- Red dot: Offer booked (receiver view); can be canceled by the receiver within the proper time frame to benefit other users; notification will be sent to the provider.
- Red dot: Offer booked (provider view); can be deleted with negative points; notification will be sent to reciever.

- Black dot: Offer booked by another user.

- If you wish to offer a volunteering service not listed in the application:
- On the right side panel, select "Add New Titles".
- Type in your new service request and submit.
- You will receive an email upon approval from the admin.
- You can then return to the calendar and continue from step 6.
The rest of the application is quite intuitive and self-explanatory.
At any point, you're welcome to contact the admin by visiting the "Contact Admin" page, where you can send your suggestions and share your point of view.